13 June 2018 / Last updated: 13 Jun 2018
Go flows with Flogo, a framework for ultralight edge microservices
Execution time:
Difficulty:
Cost:
This post was written by Eric Carlier of TIBCO Software.

What is Project Flogo?
Project Flogo is an application integration framework, written in Go and designed for deploying ultra-lightweight microservices to the edge. Flogo provides a web UI to help you graphically design and debug your application logic, which is compiled into a single binary for use on your IoT devices. Flogo was initially designed to address edge devices, but with the emergence of microservices and FaaS (Function as a Service) frameworks, such as AWS Lambda, it has also found a home on the cloud.
In this post, we'll show you how a basic Hello World application is set up in the web UI and then deployed with resin.io. For more details, be sure to check out the Project Flogo GitHub repo, where you will find documentation, community information, samples, and source code.
Hello World application
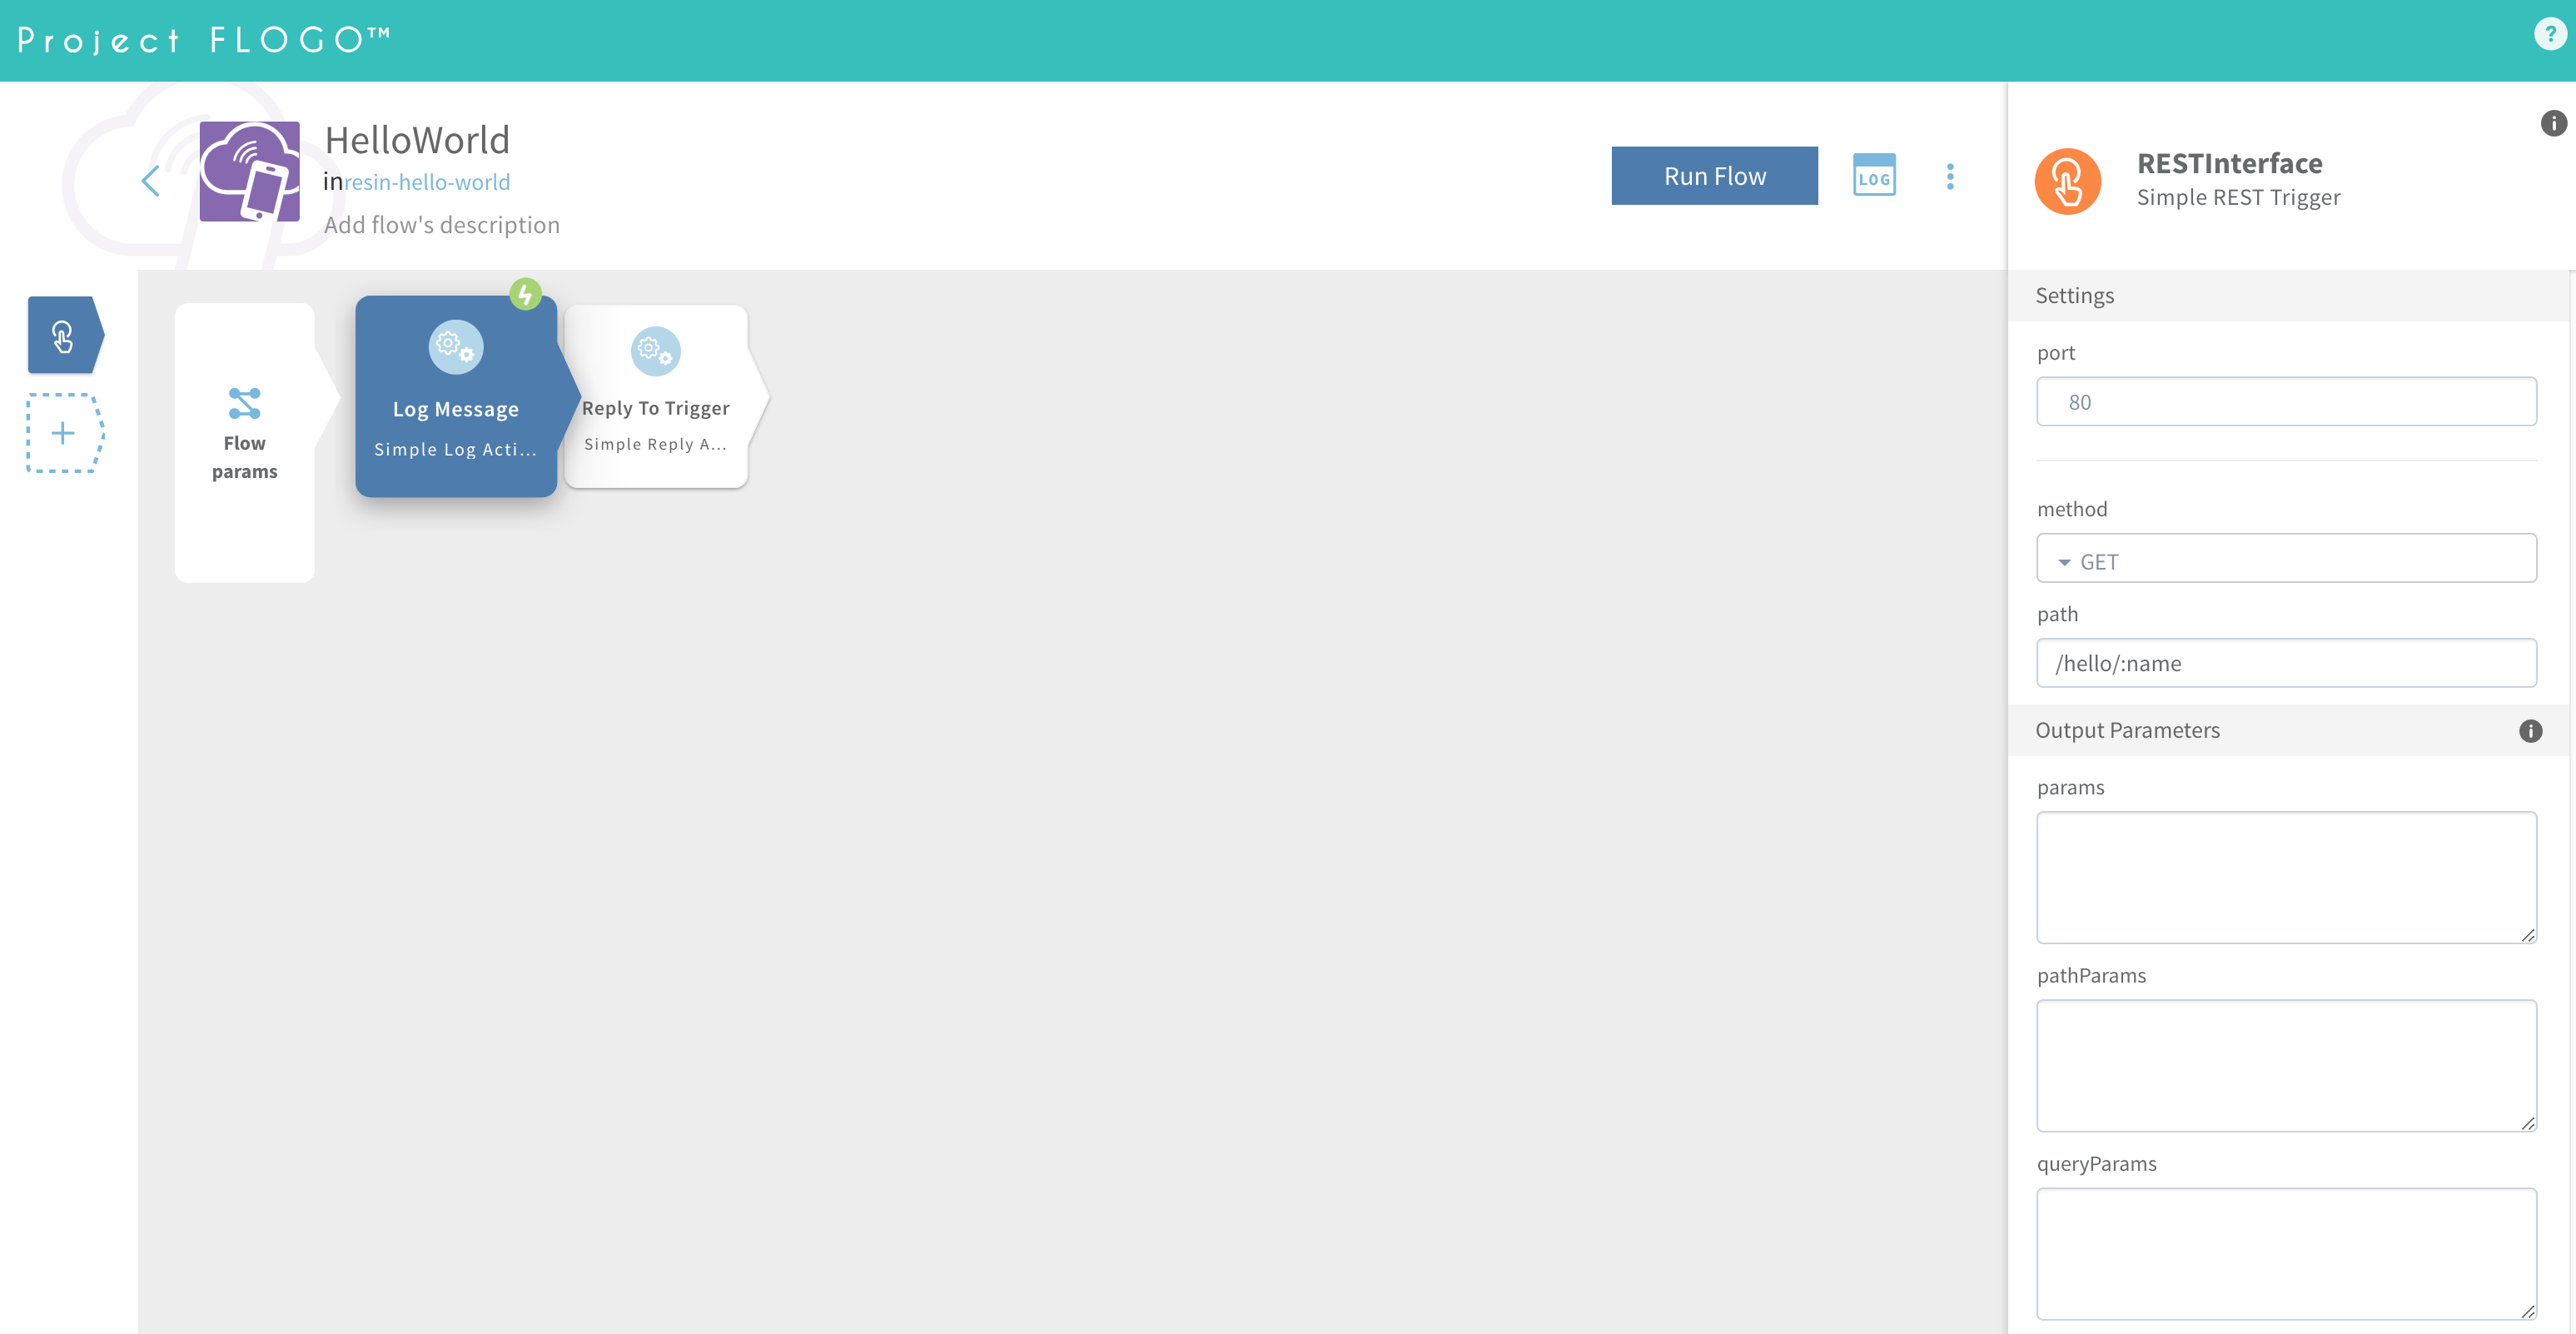
This is what a Hello World application looks like in the Flogo web development UI:
-
Project Flogo is event-based. On the left side of the gray rectangle are the triggers, which define how events (and thus data) are collected from the external world. Here, I am using a REST trigger, but there are triggers for MQTT, CoAP, Kafka, and many more, and the community is constantly building new ones.
-
Events are mapped to flows (designed in the grey rectangle), functions with input and output parameters. A flow is constructed as a sequence of activities, or sub-flows. Activities are tasks, which typically take input parameters from the flow and/or previous activities, perform an action (like data manipulation or calling an external service), then set output parameters for subsequent activities.
-
Activities and triggers can be added in the following ways:
- From existing activities, maintained by the Flogo team.
- From any other activity or trigger available on GitHub. This is as easy as entering the URL of the directory where the activity or trigger source code can be found.
- As new code developed in Go, using the documentation and tools we provide to generate skeleton code.
-
The first two options allow applications to be built without writing any code!
Deploy with resin.io
With resin.io, setting up my device to run a Hello World application only took a few minutes. I followed the step-by-step instructions in the Raspberry Pi 3 getting started guide, which included signing up for a resin.io account, creating an application, configuring and downloading a resinOS image, flashing the image to an SD card, and inserting the SD card into my Raspberry Pi. When I powered up my device, it appeared in the resin.io dashboard in minutes, ready to download some code.
Once my device was ready, I had to find a way to package my Flogo app as a Docker image. This meant writing a Dockerfile, used by the resin.io build servers to generate an image for the device. I had two possible options, both of which would've worked:
-
The binary option:
- Generate the binary on my development desktop using cross-compilation, enabled in Go since version 1.5. I would simply have to set the
GOARM,GOARCH&GOOSenv variables correctly when I compiled, as described here. - Store my generated binary under Git control.
- Write my Dockerfile to use the simplest Linux base image and have it to copy my binary to the generated image
- Generate the binary on my development desktop using cross-compilation, enabled in Go since version 1.5. I would simply have to set the
-
The source option:
- From the Project Flogo web UI, I could export my application as a JSON file containing a full description of the flows and triggers. The JSON file would act as the source code of my application (and could even be edited directly, as the JSON structure is public and documented). This JSON file could then be stored under Git source control.
- In the Dockerfile, I would then need to generate an image with Go and Project Flogo layers installed, and then compile the app during the image generation process.
I chose the source option, mainly because I don't like the idea of storing a generated binary under source control. This also gave me the ability to leverage the templating feature of resin.io. With Dockerfile templates, the resin.io build servers choose a base image to match the device type of the application the image is being built for. This makes it possible to use the one Dockerfile across multiple applications, even if they applications have different device types.
This being said, if image size had been a primary concern then the binary option would've been preferred.
Here is the resulting
Dockerfile.template:## template will select the right base image based on application device type
## also notice '-golang'
## as resin.io provides a base image with golang already installed
FROM resin/%%RESIN_MACHINE_NAME%%-golang:slim
ENV INITSYSTEM on
Flogo application file and application name
ENV FLOGO_APP_FILE flogo-simple-app.json
ENV FLOGO_APP_NAME flogo-simple-app
Get 3rd golang package dependency tool used by Flogo
RUN go get -u github.com/golang/dep/cmd/dep
Get Flogo CLI tools and libs
RUN go get -u github.com/TIBCOSoftware/flogo-cli/...
WORKDIR $GOPATH/src/flogo-app
Copy the application source file
COPY $FLOGO_APP_FILE ./
Create a directory for the application, resolving
and fetching all required dependencies
RUN flogo create -f $FLOGO_APP_FILE
WORKDIR $GOPATH/src/flogo-app/$FLOGO_APP_NAME
Compile and generate the application binary
RUN flogo build -o -e
Launch the Flogo app on startup of the image
CMD bin/$FLOGO_APP_NAME
This
Dockerfile.template and the JSON application file are the only files I need in my Git repo.To get my application to my device, I committed my two files locally, then added my resin.io application's remote repo with the following command, copied from the top-right corner of my dashboard:
git remote add resin <USERNAME>@git.resin.io:<USERNAME>/<APPNAME>.git
The final step was to push everything to the remote repo:
git push resin master
Once this command was executed the build process began within a few seconds, and not long after my Flogo application was successfully running on my Raspberry Pi 3.
For more information
If you're ready to build and deploy your own Flogo application, feel free to start with my repo for this Hello World application. Once things are up and running, you can use the Project Flogo and resin.io docs to add more functionality. And if you have any questions along the way, you can reach out directly to me at ecarlier@tibco.com!

by Team balenaThe global group of product builders that brings you balena